Introduction
It is very common for people to have a want of good engaged following for their Instagram accounts with hundreds of likes on their pictures. Ever scrolled down on its official app and got stuck at a beautiful photo capturing the sunset with contrasting hues of colours making a picturesque view which you can’t help but envy and secretly wish it to be yours? Everyone wants good amount of likes and comments on their posts as this is nowadays a supreme measure of flattery and popularity as well. There is a lot to compete with when we talk about likes, followers and above all the content of the accounts. This article demonstrates how to beautify own photos to share on instagram with various tools.
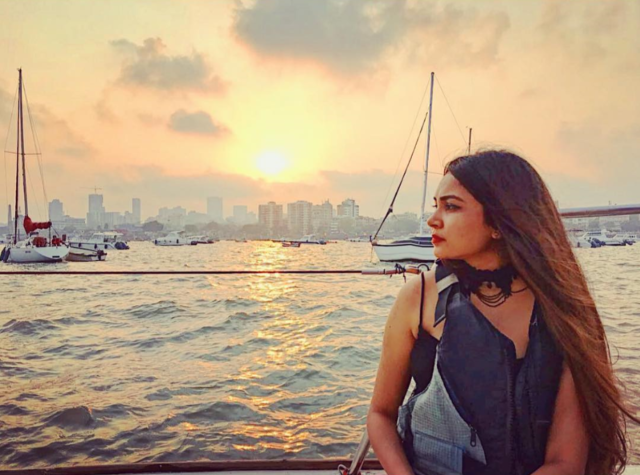
How to Use inbuilt Filters on Instagram
Instagram provides several inbuilt filters on its app, they can be used by capturing a scene from the camera, or to an existing media taken from the gallery. The filters can be accessed by clicking on the next button after selecting the photo or the video from the app. Each filter is represented by a colored icon, which automatically applies on the image or the video in real time. Photo posting functionality can be accessed via the plus icon on the main menu of the instagram app. In addition to the filters, the app even allows to add effects to the pictures, and videos as well. Some of the popular effects are brightness , contrast, warmath, saturation, color, fade, highlights, shadows, vignette.
The thumb rule of choosing filters is to not be overwhelmed with them, rather make it simple and effective. The filters are really pretty and the most popular ones are – Gingham, Moon, Juno and Mayfair. There are beautiful feeds of many celebrities and influencers who have a lot of followers, and engagements, and they stick to particular colour scheme to make their profile unique, and attractive; hence sticking to one set of filters is important to maintain the consistency of the profile. However, the basic filters provided by Instagram are still not enough to further beautify the pictures as these are just generalized colour schemes not aiming at specific pictures. The solution to your dilemma of not having amazing pictures to post on your Instagram is using a third party app available in the play store or the app store.
How to Use Adobe Lightroom CC on Windows 10 for Instagram Photos
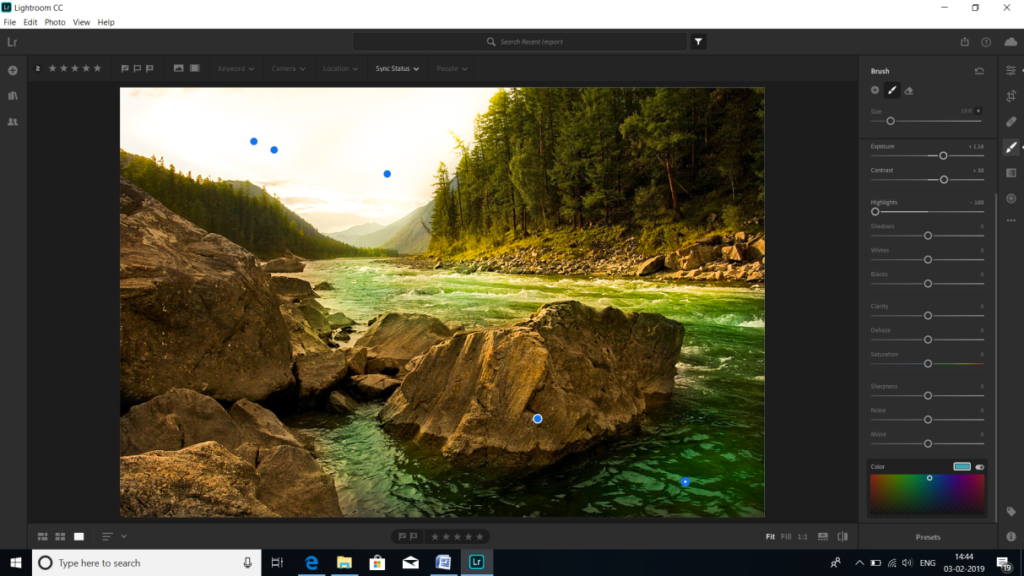
Adobe Lightroom CC is being used a lot nowadays for beautifying Instagram photos. Let us take a look at a very simple tutorial which will give information about how to shape the light and Mood.
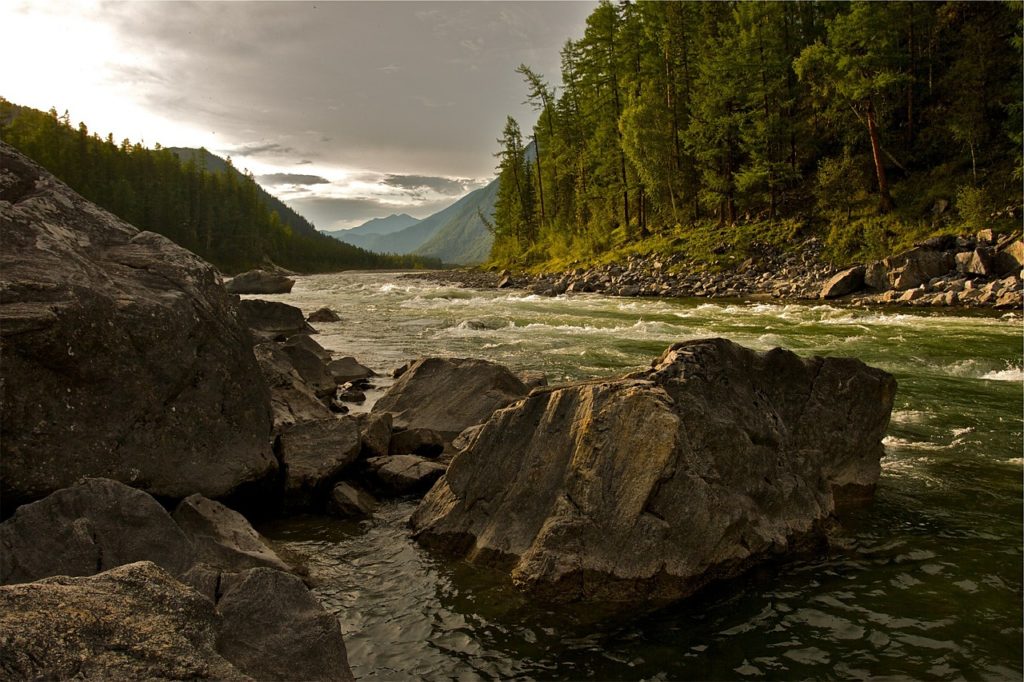
- Let us start with a beautiful picture. Begin with by importing the picture into your Adobe Lightroom CC application. Before getting into the technicalities of the editing procedure we must be aware of few terms. A local adjustment is said to be when we adjust light in particular areas, whereas a global adjustment is said to be when the light is adjusted for the entire picture in general.

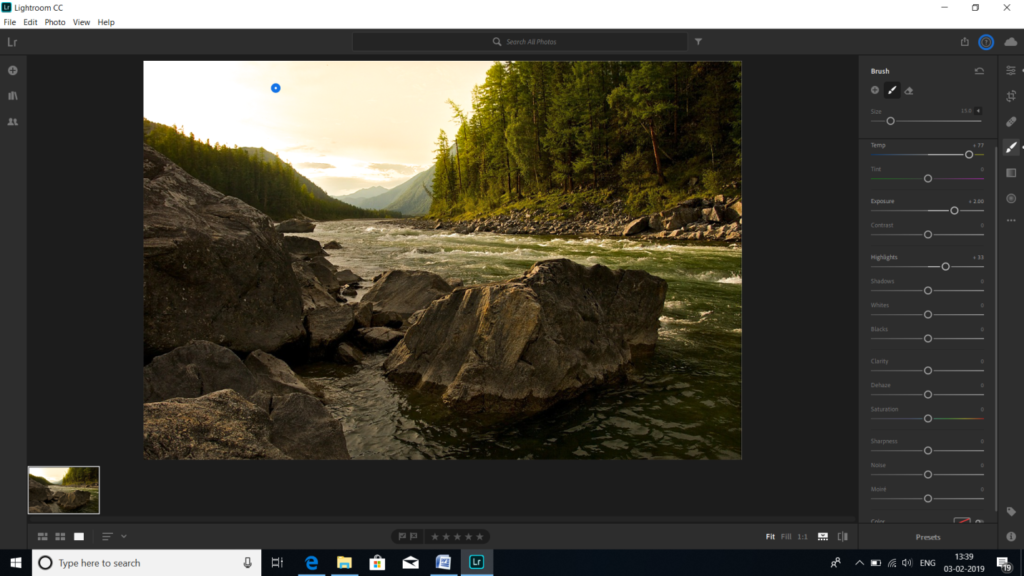
- The first thing to do in this edit is to adjust the temperature of the picture to make it look like a less stormy day and more of a sunny day by locally adjusting the temperature and exposure over the sky area by using the brush tool. There is no right way of doing the adjustment over blacks, whites, shadows or any particular order to follow, one must always trust his/her instincts while adjusting them in their own preferred order to get the desired effect. A good trick is to hold the shift key while holding the cursor over the black slider and double click on it to automatically adjust the blacks.

- The next thing to keep in mind is while adjusting the clarity, one must always take care of the edge halo. Always zoom in the picture and adjust the clarity to remove the edge halo.
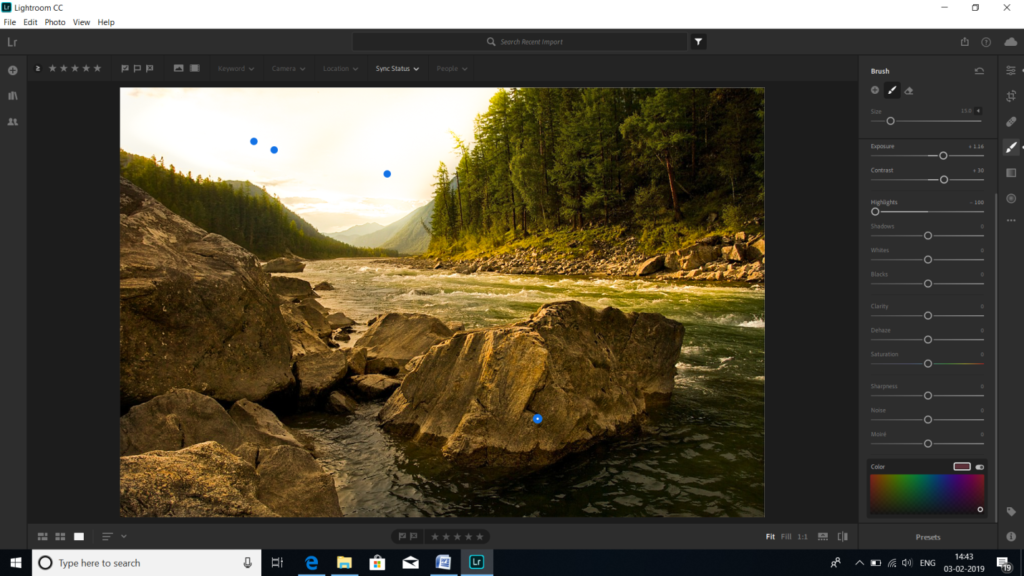
- The next thing we can edit is the rocks in the picture. The rocks look extremely dull due to less light fall on them, which we can selectively brighten by adjusting the lights and colours in it.

- We can do many more global adjustments to the picture as well but the entire motive to edit the image was to make it more sunnier and less darker. The colour of the water body can be adjusted to a slightly greenish tinge to give an effect of reflection from all the trees and to present a greener look .

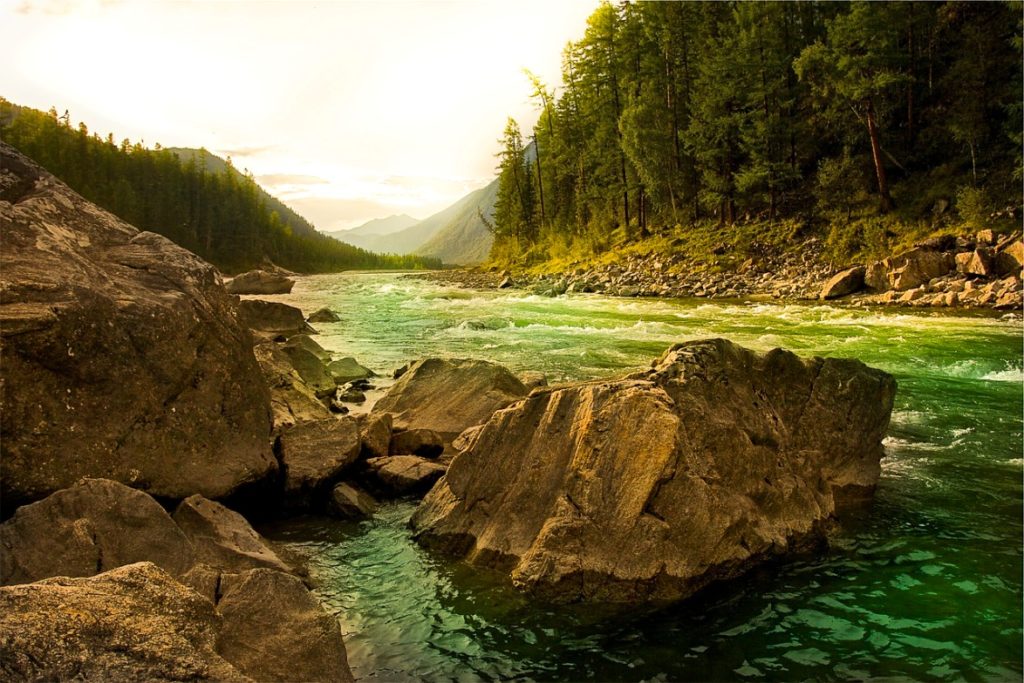
- This is the final image which gives us a sunnier or day time vibes. We can selectively lighten and adjust colours on the pictures with the brush tool in the lightroom.

There are many other instances when you are searching for throwback pictures of your vacation in your gallery to upload, but ended up finding the beautiful picture in undesirable state, such as low lighting, poor colors, poor contrast or brightness, washed up colors. You can also use the selective colouring brushes to create an artistic effect on your blurry picture as well. On facial photos, this is quite useful in lighting certain areas of the face.
Conclusion
There are a large number of Photo editing apps available on both app store, and playstore. Some of the popular ones are Snapseed, Enlight Photofox, Adobe Photoshop Lightroom CC, PicsArt Photo Studio, VSCO. The purpose of beautifying a photo is to get attention from the fanbase on Instagram. The more attention the user gets, the larger the fan base it will get. This is quite useful for businesses, celebrities to market themselves. Even though the default filters in Instagram app itself is sufficient for basic editing, a professional tool like Adobe lightroom CC easily beats it in terms of functionality, and quality. However, professional tools tend to be pricey.







Hello. And Bye.