Using categories is a great way to organize your emails. It helps clear clutter and makes it easier to find specific emails. In this article, we will learn how to add a specific category to the Outlook sidebar. This is applicable for Outlook on Office 365 subscriptions or an individual/personal Microsoft account.
Step 1: Categorize your emails
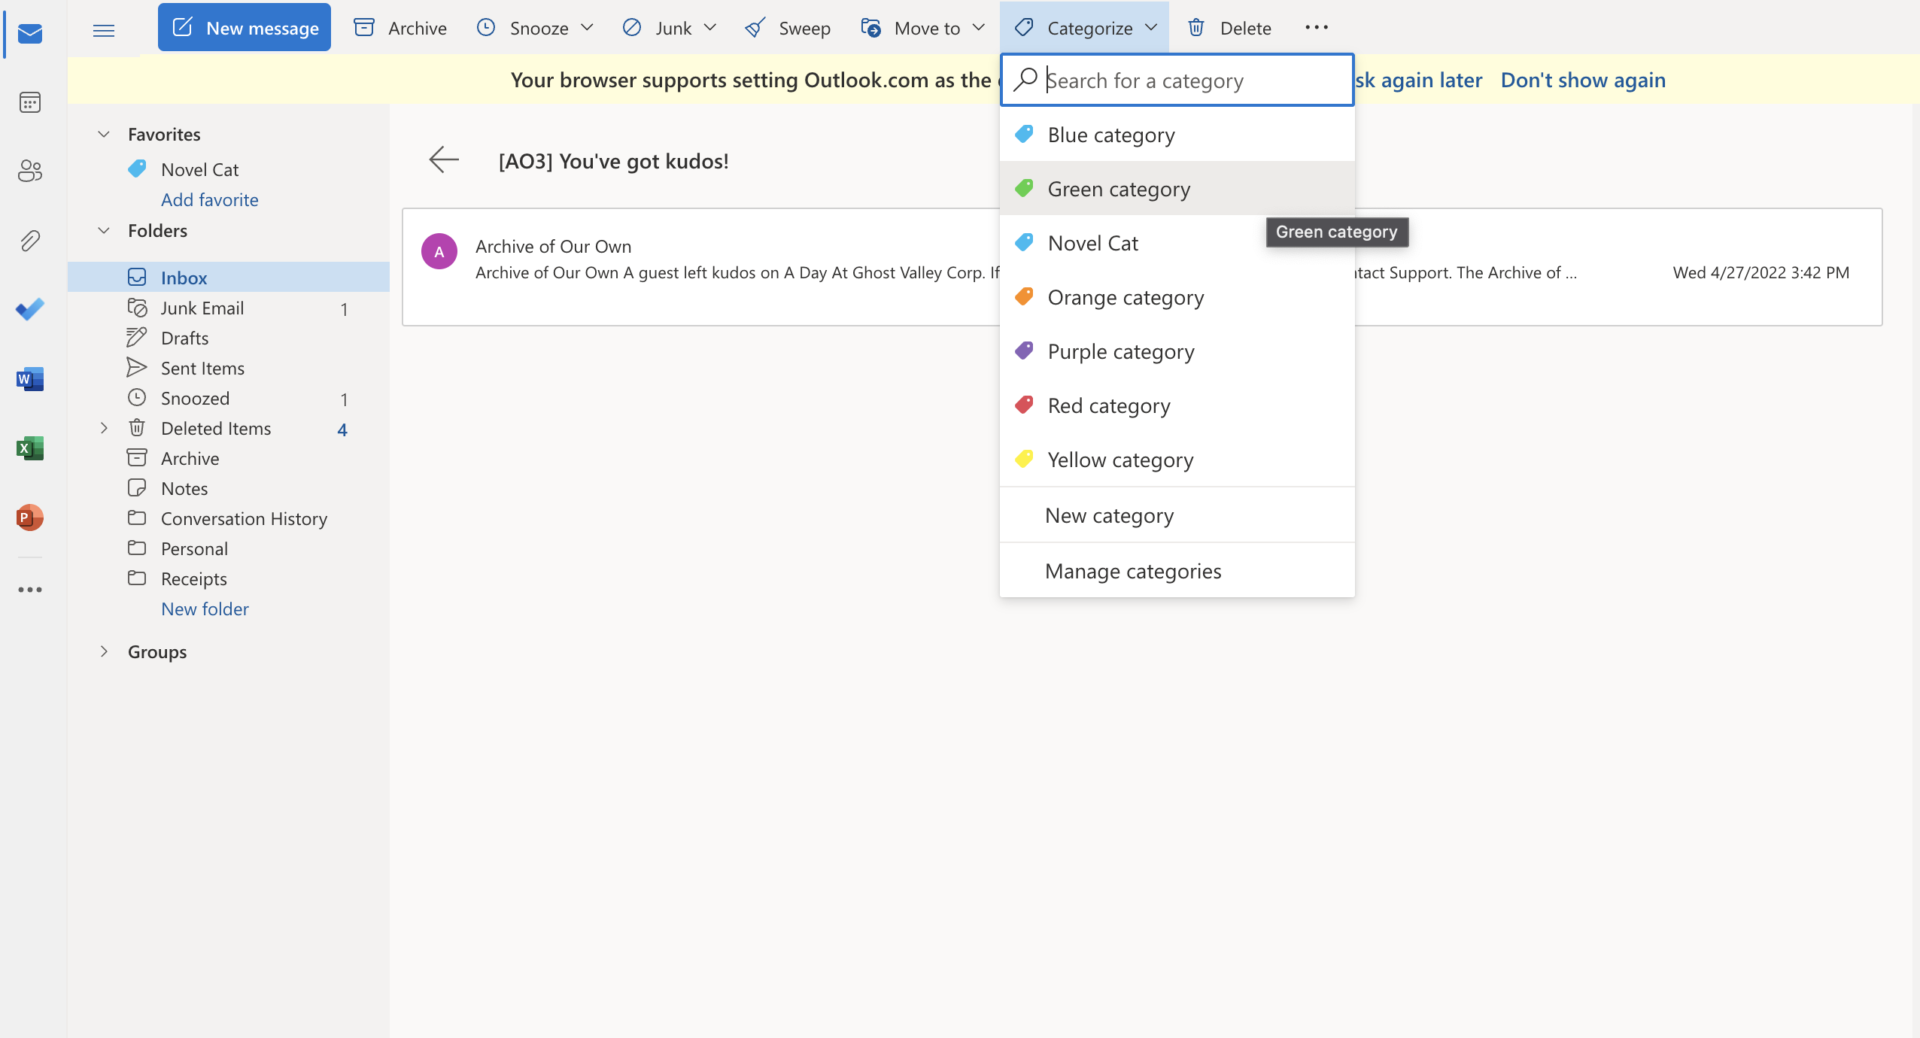
Before we learn how to make “categories” visible in the Outlook sidebar, we need to ensure that the categories exist. By default, certain category colours are created by Outlook itself. Simply click on the top of the mail where the “Categories” button is and select the category you want it to be sorted into or create a new category.


Step 4: Check Outlook Sidebar to Find your Category there
You will now find the starred category in your outlook inbox sidebar
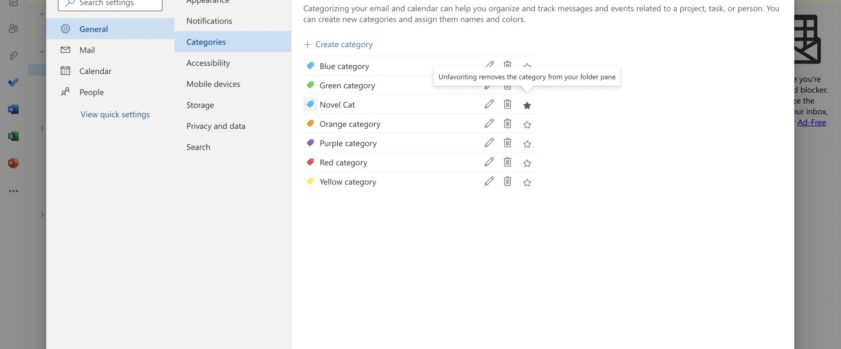
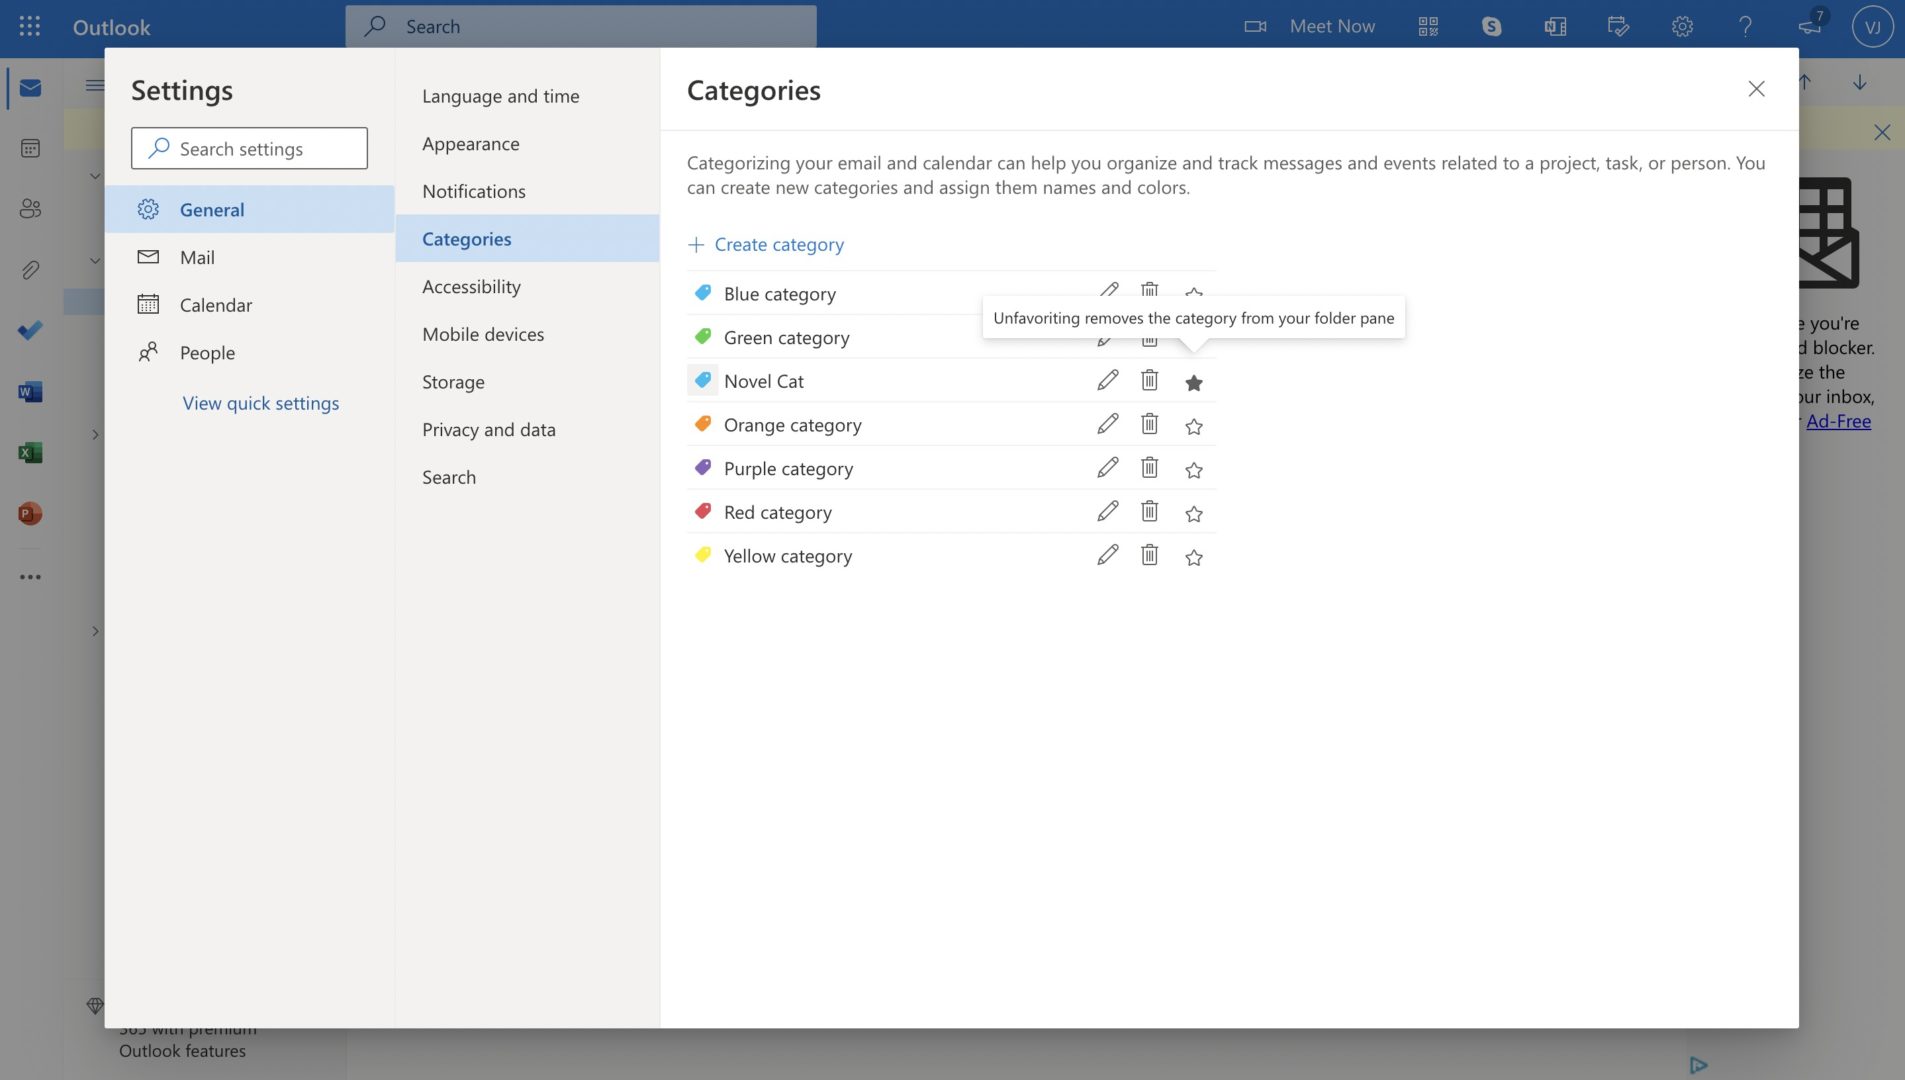
To remove a category from the sidebar, navigate to Categories under Settings and uncheck the star mark to unfavourite the item. Unfavouriting the item will automatically remove the category from the Outlook sidebar.
To learn more about email filter tips and tricks, check out this article on how to filter emails like a pro on Gmail.