Table of Contents
Introduction
Unlike previous versions, it’s relatively difficult to disable automatic updates on Windows 10, as now it’s enforced by Microsoft to keep PC up-to-date without the explicit consent of the user, which means whether users agree or not, Windows 10 receives automatic updates. There is no convenient way in Windows 10 to permanently disable the updates like in Windows 7. Having updates enforced on the PC might have a lot of negative consequences, for example certain updates might disrupt the functionality of Windows operating system making users to spend hours of their valuable time to fix it, certain updates might hinder the performance such as spectre and meltdown patches, certain updates might cost to the user’s monthly internet bill as Windows 10 receives large updates from time to time, for instance cumulative updates can be large as over 1GB, and certain updates can also disrupt hardware functionality due to incompatibility of older hardware drivers with newer version of Windows 10. So this guide demonstrates 8 working methods to disable automatic updates on Windows 10.
Disable Windows 10 Update Temporarily
Disabling updates temporarily is one of the best ways to defer the updates for 35 days. Furthermore, feature updates, and security updates can be deferred 365 days and 30 days respectively. However, if automatic updating is paused, the latest version of Windows has to be downloaded to pause the automatic updating again. This is ideal for deferring the updating process until certain tasks like projects, college assignments, and critical tasks are completed, then Windows 10 automatically resumes the automatic updating after the time expired.
- Take the mouse monitor over “Start Icon”, and click to open the start menu.


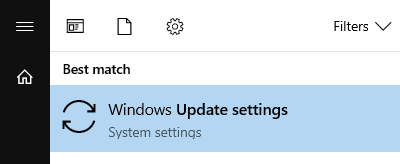
- Type “Windows update settings” on start menu to launch the update settings window.

- Locate “Advanced options” under the list of update section, then click to access “Advanced Options” window.


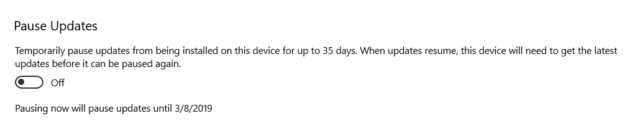
- Locate “Pause Updates” section, and click on the slider to pause the automatic updating process. (Off : automatic updating continues, On: automatic updating is paused)

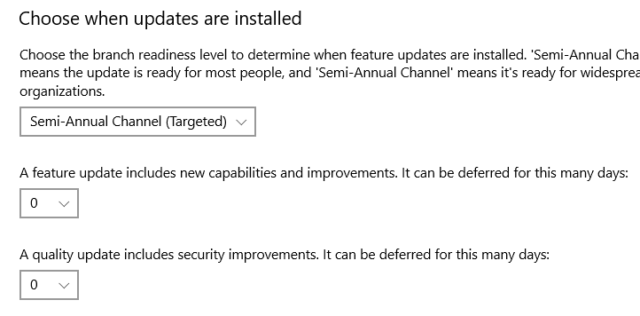
- Furthermore, in “Choose when updates are installed”, defer the feature updates, security updates by assigning a value to the checkbox in the appropriate option. Feature updates can be deferred up to 365 days, whereas security updates can be deferred up to 30 days.

Restrict Windows 10 Update by Setting Ethernet or WiFi Connection to Metered Connection.
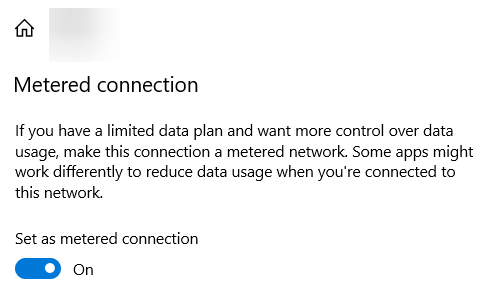
Since 1703 version of Windows 10, Metered connection feature was introduced to Ethernet connections as well apart from WiFi connections. Metered connections limit the bandwidth consumption of the entire operating system by restricting some functionalities of the operating system in order to save the data quota of the user’s internet package. This is quite useful for those who subscribed to limited data packages or FUP (fair usage policy) applicable packages, which throttle the bandwidth after the given data quota was exceeded. Metered connections, regardless of the connection’s type, make Windows to download only priority updates such as security updates, Windows defender antivirus definition. Furthermore, it pauses OneDrive sync, apps downloading/updating from Microsoft Store, start screen tiles from updating themselves. The following tutorial demonstrates how to enable Metered connection on both WiFi, and Ethernet connections.
- Take the mouse pointer on “Start Icon”, and click to open the start menu.
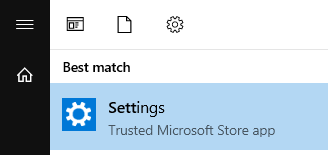
- On start menu, search for “Settings” by typing in its search box.

- Click to access “Network and Internet” section


- Select one of the connection types from the following screenshots. Ethernet connections are for wired Internet connections, whereas WiFi connections are for Wireless Internet connections. on Laptops, tablets it’s most likely WiFi, whereas on Desktop PCs it’s most likely Ethernet connections.


- Either way, click on the Network adapter/hotspot button to access its Internal settings window.
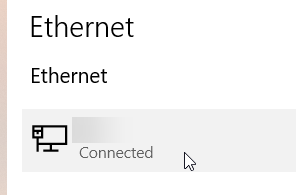

An Ethernet Connection 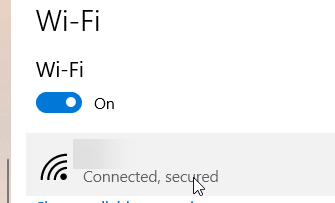

A WiFi Connection - Scroll down of the window to reach “Metered connection”, then click on the slider to turn on “Metered connection” . Click on it again to disable “Metered connection”.

Disable Windows 10 Updates with Group Policy
Group policy is a feature available from Windows 10 Pro, and above versions, and can be used to manage working environment of user accounts, user accounts from a central location. Group policy is not available in Windows Home edition; hence use one of another solutions mentioned here to disable Windows updates. Group policy can be used to disable Windows updates altogether, and is recommended over other solutions. However, Windows may frequently notify to update the operating system with a blue dialog window. It can be annoying over time; hence using this solution in combination with metered connection is the most ideal solution to tackle automatic Windows updates.
- Take the mouse pointer on “Start Icon”, and click to open the start menu.
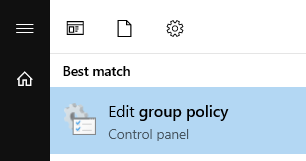
- Search in the start menu “Edit group policy”, and click to launch it

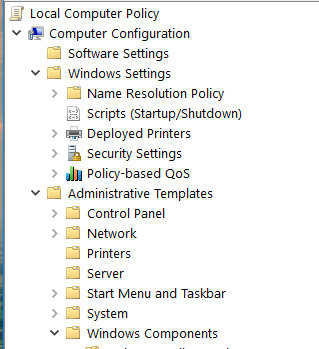
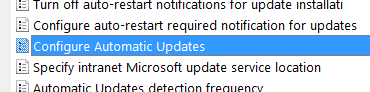
- In Group policy application, navigate to Local Computer Policy -> Computer Configuration -> Administrative Templates -> Windows Components -> Windows Update, and locate “Configure Automatic Updates”, then double click to launch it.


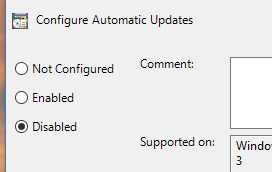
- In “Configure automatic updates” Window, locate “Disabled” radio box, and activate it to disable automatic updating of Windows as seen in the following screenshot.


Disable Windows 10 Update with Windows Registry
Windows registry is sort of a database to store settings of the operating system, and its applications. Automatic updates on Windows 10 can be disabled with this tool with ease. However, since this registry setting is a part of group policy, it may not work with Windows 10 Home edition, and thus this solution is only for Windows Pro and above versions that have group policy feature available.
- Take the mouse pointer on “Start Icon”, and click to open the start menu.
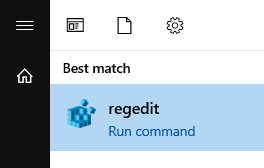
- Type “regedit” to search for Windows Registry Editor. Once located it, click to launch.

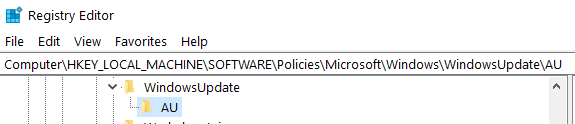
- In the Windows registry editor, use the following address in its “Address Bar” to directly access to the relevant registry key. The key to be searched is “AU” in “Windows update” main key. The Computer\HKEY_LOCAL_MACHINE\SOFTWARE\Policies\Microsoft\Windows\WindowsUpdate\AU

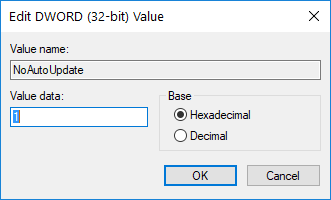
- In the AU key, locate “NoAutoUpdate” DWORD (32bit) value. If it doesn’t exist right click anywhere on the white screen background to create a new DWORD (32bit) value.
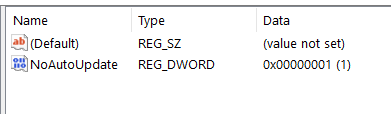

- Double click on it to edit the value. Use “1” to disable the Auto date, and use “0” to enable the Auto update. Make sure to use Hexadecimal as the base of the value. Once it’s completed, click Okay to save the changes.

Disable Windows 10 Update with Windows Services
Windows services are applications running behind the scene while performing important functions required for either an application or the core operating system. Windows update is actually a service application running in the background. When this service is running, Windows 10 automatically downloads its updates, and then installs and informs the user to restart the computer to make changes to take effect, but if it’s not running, Windows 10 update is interrupted, and thereby automatic update is disabled.
- Take the mouse pointer on “Start Icon”, and click to open the start menu.
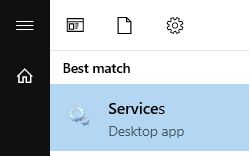
- Search for “Services’ in the start menu, then click to launch “Services” app.

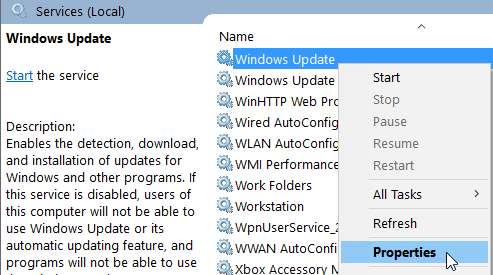
- In the Services app, scroll down to the list to find “Windows Update” item, then right click on it, and select “Properties” from the drop down menu.

- In the “Windows Update” item, move the cursor a bit downward to locate “Service status”, then click “Stop”, then in “Startup type” option, select “Disabled”
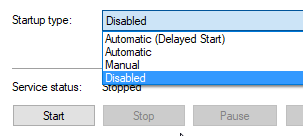

- Finally, click “Apply”, and “Okay” to save the changes to take effect.
Disable Windows 10 Update with Windows PowerShell
PowerShell is a command line interface, and a scripting language used in Windows operating system for system administration, and automating the tasks. It’s quite similar to the classical Command Prompt, aka CMD application, but more advanced, and complex than that. Like with CMD, the Windows updating can be disabled with ease with PowerShell with one command. This solution is ideal for Windows 10 Home Edition as it doesn’t allow access to group policy.
- Take the mouse pointer on “Start Icon”, and click to open the start menu.
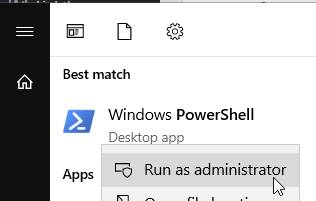
- Search for “Windows PowerShell” in the start menu. Once locating it, right click on it, then select “Run as administrator”

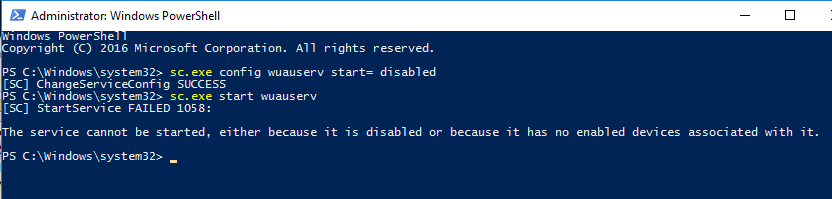
- In the PowerShell console, type the following three commands. The first command set the “Start up type” to “Disabled” mode; hence Windows 10 no longer automatically start it when Windows boots up, the second command actually stop the service from running in the background. As explained earlier in “Services” solution, when the Windows update service is not running, Windows 10 is unable to initiate the updating process. The third command tries to start the Windows update service, and fails in this case as it’s disabled. So it’s useful in checking whether the service is indeed disabled or not.
sc.exe config wuauserv start= disabled
sc.exe stop wuauserv
sc.exe start wuauserv

Disable Windows 10 Update with Windows Command Prompt
This is same as the aforesaid PowerShell example, but disable the Windows update via the Command Prompt. This requires Windows administrator privilege, and works with Windows 10 Home and above all editions.
- Take the mouse pointer on “Start Icon”, and click to open the start menu.
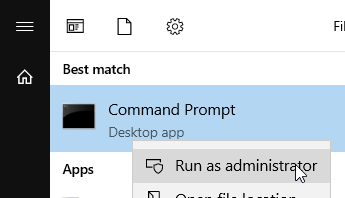
- In start menu, search for “Command Prompt”, right click on it, and select “Run ad administrator” to launch it.

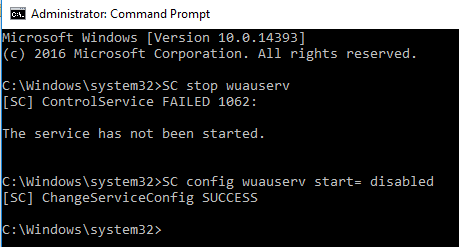
- In the Command prompt, type the follow two commands to stop, and disable the Windows 10 update service. The first command stop the service from running, the second command disables it so it doesn’t automatically launch when Windows 10 boots up.
SC stop wuauserv
SC config wuauserv start= disabled

Disable Windows 10 Update with Windows Task Scheduler
It’s observed sometimes Windows automatically enables the automatic update service, and resumes the update process even if it’s disabled. This leads Windows 10 to silently download, and install Windows updates, and consumes a large amount of data of the user’s Internet package. This segment demonstrates how prevent Windows 10 from resuming the update with Windows Task scheduler. Task scheduler uses command prompt to disable the Windows 10 update automatically whenever Windows 10 resumes the update. Task scheduler detects whether Windows 10 resumes the update service. If it’s resumed, Task scheduler executes the given bat file to disable the Windows update in the background silently. Whole disabling process is fully automated; hence user doesn’t have to disable Windows update manually whenever Windows 10 resumes update service. This solution is the most ideal one for Windows 10 home users to disable Windows 10 automatic update permanently. For Windows 10 Pro, and above versions it’s recommended to use “Group Policy” method mentioned above.
- Take the mouse pointer on “Start Icon”, and click to open the start menu.
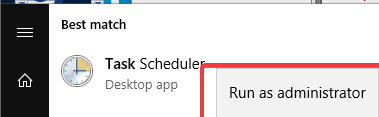
- In the start menu, search for “Task Scheduler”, right click on it, and select “Run as administrator”


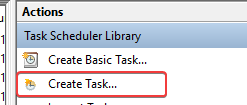
- In the “Task Scheduler” application, locate “Create Task” option in “Actions” category, then click to open it.

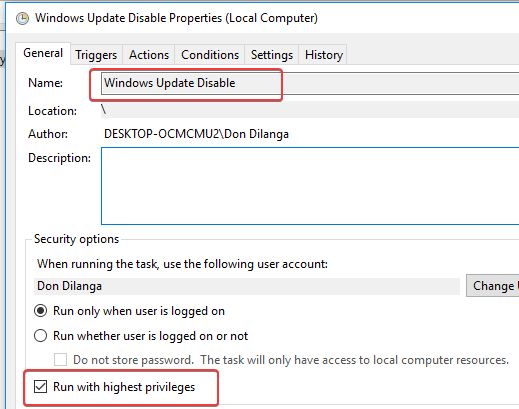
- Give it a suitable name as seen in the following screenshot. This name represents this particular task, and then can be seen in the task scheduler as one of the available tasks. In the screenshot the given name is “Windows Update Disable”. Furthermore, click on “Run with highest privilege” checkbox to allow task scheduler to execute the assigned “Action” (in Actions tab) in administrator mode.

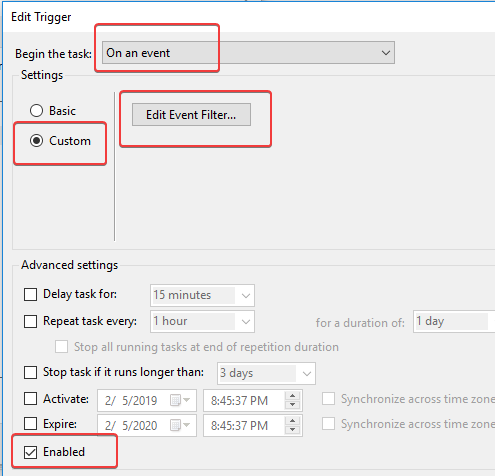
- Navigate to “Triggers” section, click on “New” button to add a trigger. A Trigger is an event happened, or happening in the operating system. In this particular scenario the event is the Windows 10 resumes its automatic update service. Select “On an event” as “Begin the task” option, “Custom” as the “Settings” option, then click “Enable” to enable the trigger, then finally click on “Edit Event Filter” button to access the “Event Filter” window. In this case, when an event occurred, the task is executed automatically by the task Scheduler.

- Switch to “XML” tab, click on “Edit query manually” to enable the XPath form, then copy and paste the following query into it. It makes the trigger to be satisfied when “Windows Update” service is changed its state from “disabled” to either “Manual” or “Automatic” state ( See 4th number in “Disable Windows 10 Updating in Windows Services”).
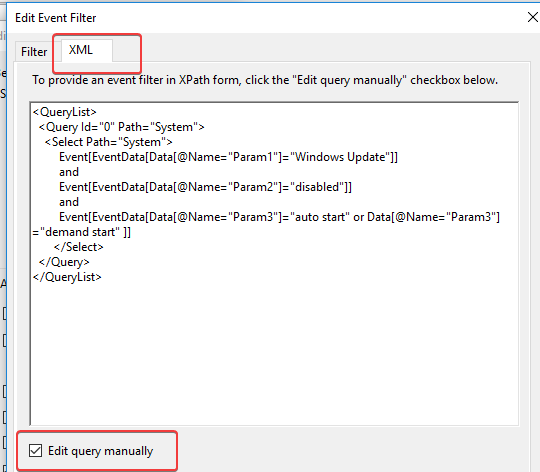

<QueryList> <Query Id="0" Path="System"> <Select Path="System"> Event[EventData[Data[@Name="Param1"]="Windows Update"]] and Event[EventData[Data[@Name="Param2"]="disabled"]] and Event[EventData[Data[@Name="Param3"]="auto start" or Data[@Name="Param3"]="demand start" ]] </Select> </Query> </QueryList> - Keep the task scheduler aside for a bit, open the “Notepad” via the Windows start menu.


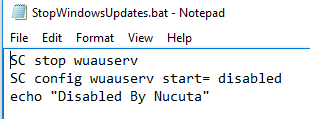
- Copy the following code into Notepad instance.
SC stop wuauserv
SC config wuauserv start= disabled
echo "Disabled By Nucuta"
- The last line is optional. You may remove it if desired.

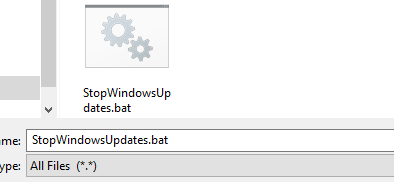
- Save the Notepad instance as “StopWindowsUpdate.bat” (or “Your Name”.bat), and select “All Files” as the file type, then save the file to anywhere in the PC. It’s recommended to save in a permanent location as if the file was moved somewhere else later on, task scheduler is unable to execute this file.

- Now get back to task scheduler, switch to “Actions” tab, click on “New” button to add an action to the trigger. This action is executed, when the condition defined in “Triggers” tab is met, for instance if the Trigger (or event in this scenario) is Windows 10 resumes its update service automatically, and the “Actions” is disable the Windows update service, when Windows actually resumes the update service, task scheduler detects the new event, and executes the action defined in “actions” tab.
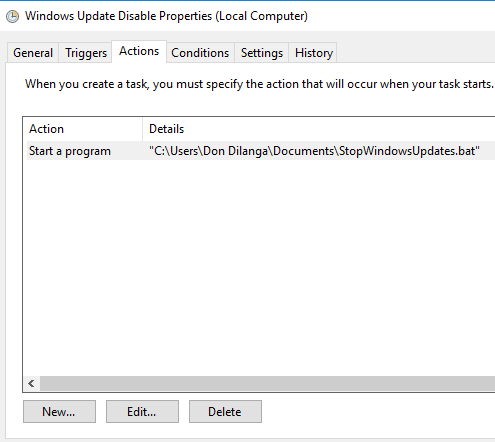

- As the “Action” select “Start a program”, and as the script to be executed, select the batch (.bat) file made earlier in this segment. After the step was completed save the changes to take effect.


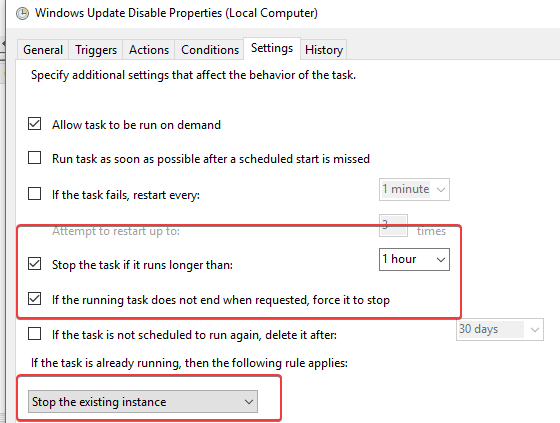
- Switch to “Settings” tab at last, then select “Stop the task if it runs longer than 1 hour” to prevent any kind of a glitch from happening, select “if the running task does not end when request, force it to stop” for the same reason, then finally select “Stop the existing instance” from the drop down menu to force the task scheduler to initiate a new instance if another instance of this task is running. These options are not important, but they may prevent any glitches from disturbing the task.