Most of us nowadays have huge music collections on our computers. These songs are our stress busters and need to be kept in an organized manner so that we can easily pick up a song amongst thousands of files when it is needed the most, or else that song would be of no good. Locating songs can be turned into a very simple task provided you have entered all the relevant metadata. Metadata is basically the allied data like Artist, Album Name, Year, Track Number and so forth that can help differentiate a song from others. Commonly they are known as tags, and the most commonly used version of tags nowadays is ID v3. Today we’ll look at entering the metadata for your songs stored in OneDrive and Local hard drive for renaming purpose. If you have been looking for an easy way to rename songs or music files, then you came to the right spot. The following guide is also suitable to rename songs stored in the google drive, dropbox as well as long as they are accessible from the computer. We’ve come up with broadly 2 different methods to enter the metadata (tags) for these songs.
Groove Music

If you’re a Windows 8/8.1 or 10 user, changing or editing tags becomes quite a simple job. All you have to do is let groove to know where the music files and songs are located in the hard drive. Groove will scan them, add them to its playlist, and then automatically fix the naming problems of the added music files and songs. If they were incorrectly labeled, groove will also fix such cases automatically.
- Open groove, locate and click “Settings” to access its settings window.

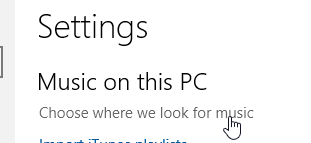
- In the settings window, click “choose where we look for music”.

- Now add all the folders where music/songs files are stored. Upon adding, groove will automatically scan them, and add them to its playlist.

And if you happen to have connected your OneDrive account to Groove library, things won’t look as brighter and simpler than ever before. The reason we say this is because you virtually don’t need to do anything at all! Groove will search and fetch all the relevant metadata related to all the songs (provided you’ve named them correctly) and update them with lightening fast speed.
Easy File Renamer
If you don’t use Groove (just because you’re more comfortable with any other media player or you’re not using Windows 10/8/8.1), we’ve got another nobel solution for you. You can use a third-party software to perform all the needful work within minutes. Just make sure you’ve synced all the data on OneDrive to your pc. Next, download EasyFileRenamer and then install it by executing the setup file. The installation will be over very soon.
To begin the process, you can add up as many MP3 files as you wish by clicking the Mp3 Files button. Also, if some of the file names don’t describe the song enough for clarity, you can also play the audio file via the inbuilt music player that appears at the bottom once you’ve selected an MP3 file.

Now you can either
- Update tags of individual files
- Apply bulk tag updates
Update Tags of Individual Files
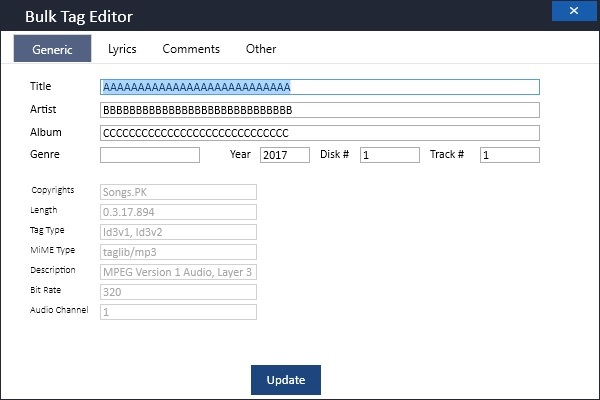
Simply add up a collection of songs and then you can easily update common fields for them (Artist, Year, Genre etc). All you need to do is click the orange colored pencil icon before the song and then enter the relevant information in the window that opens up. You can add up a lot more info related to the file including Lyrics!
Update Tags in Bulk
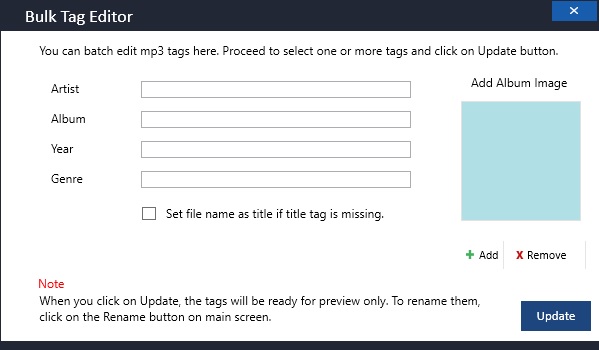
The most handy feature in this software is the ability to apply bulk tag edits regardless of the quantity of your targeted files. Just imagine the amount of time and hassle you’re going to save yourself from when applying, e.g. the Artist tag to 100 MP3 files at the stroke of one click rather than having to do it individually for every song! Simply click on the Bulk Tag Editor button and the next window that open will allow you to make changes for 5 different kinds of metadata (including AlbumArt).
Once you’ve added all the information click the Update button at the bottom-right corner of the screen. This will take you to the main window of Easy File Renamer where you will be shown a preview of all the changes that will be brought about as a result of the metadata change. When all of that seems good enough, click the green Rename button at the bottom-right corner of the screen to initiate the rename operation.
