
Before we delve into the main discussion of how to fix kernel Security Check failure BSOD error in Windows 10 we must get ourselves enlightened about what a Kernel Security Check Failure is in the first place.
Kernel failure or a kernel panic is basically a system operated phenomenon which is started by every operating system(OS) for the protection or security when any fatal or
deadly internal error in the System arises due to hardware failure or software bugging in the operating system. The Kernel Security Check occurs when there is a high
risk of the system to be unable to recover from the dire condition it is in and has high
risk of large amount of data loss.
In some cases, it still occurs that the operating system continues an operation, even after a BSOD error occurrence but the system is so unstable and bears such a unhealthy state that a huge amount of data corruption and RAM malfunctioning takes place immediately. Other than in the Kernel space, the BSOD Kernel failure is seen to occur elsewhere outside the space also. It is basically a mechanism which is deemed for detection of faults or errors which is used by every operating system. Now we need to get accustomed as to how to deal with kernel Security Check failure error in Windows 10.
One can suffice for the fact of the occurrence of kernel Security Check Failure on Windows 10 PC if the PC shows the following message:
“Your PC ran into a problem and needs to restart. We just collecting error info and then we’ll restart for you.”
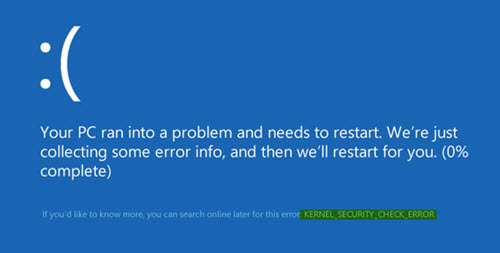
The following message appears in a blue background and it is also asked if the user wants to know more about it the online search regarding kernel Security Check error that is displayed on the page’s right hand upper corner. If one enters the present Security Check failure BSOD error in Windows 10 then one has to formerly download or install the WhoCrashed or Bluescreenview utility because that shall largely help one to understand the cause of the error.
The Mini dump files of Windows, the users with all the logs are related to the error.
- The next step to follow is to scan the Windows 10 PC all sources of malware, virus hacking, adware and any other malicious app which are likely to damage the Windows system and lead to the present issue. It is recommended that the Internet Security or the anti-virus software is run to scan or deep clean the Windows PC and remove all the dangerous viruses and problem which has been fetched henceforth. One should install all the one should install all the updates available on Windows. It is very important that the windows computer is kept updated
and all the debugging is fixed so that all the available updates are installed
automatically. - Running the System file checker is the next step that is to be followed to replace the corrupted system files if detected with other save files. And it also should be ensured that the RAM hard disc and other hardware components and accessories a properly
connected in there is no loose connection which is providing for the present error. - Next is to run the Driver verifier manager to check the corrupt drivers if any present and it shall automatically detect if any is present and uninstallation on reinstallation or
updating of the drivers is required and will function automatically. It is recommended to scan the hard disc for any errors. To enable this one may type chkdsk/f C: in CMD and
by enter in order to run Check Disk on the C: Drive of the computer. - If login into the computer is not being able then one should boot into advanced startup options and open the elevated command prompt window. This can be done in the following steps. First it is needed to select troubleshoot option > the advanced options
and then command prompt. Using the CMD one can access the advanced settings very
easily. When it is advised to go to the settings app of Windows 10 then update and security then recovery then advanced startup and then please restart now button and one will be able to enable The Legacy boot policy. After this one will definitely be able to login to the windows desktop with Windows 10 installed in 8 in safe mode. - Another effective method is to use a Memory Diagnostic tool. According to dictionary reports an area in the Random Access Memory can lead to kernel Security Check failure error and to verify whether the RAM is in good stead memory. Diagnostic tool is a great help. To access it one should press Windows + R button to open the run dialogue box and then type mdsched. exe and press enter and check for problems. One can do this by clicking on the restart now and check for
problems recommended in the dropdown menu. Once received and Windows computer will be rebooted and if no error is detected then we can take it as that it is in a good condition and it is recommended buy a new Ram stick and replace the current.
These are some of the methods that will help in the required troubleshooting and solutions to the Kernel Security Check failure BSOD error occurred in the computer.