Introduction
Google Chrome is easily the most popular web browser out there. It has made browsing the Internet a lot easier and continues to earn rich accolades from loyal customers and critics alike due to it’s sleek user interface, extremely secure yet easy to get around features. Even though it is extremely ‘light’ on the system resources and one of the more super fast browsers to have ever seen the light of the day, Chrome does get bogged down sometimes. Today we’re going to look at a few little adjustments that might help restore it to it’s super efficient working condition when the need arises. So let’s jump into the solutions one by one.
Switch Off the Sandbox Mode
One of the many innovations brought about by Chrome entail making use of all kinds of tools available to provide optimum level protection against malware threats to users. However, the downside is that this results in a significant amount of system resources being tied up by the relevant processes, which particularly affects users with low end computer systems. Often this leads to the Kill Pages error.
To get around this issue, users can opt to turn off the Sandbox Mode, however this will somewhat lower the security status of the background processes. If you understand the risks but still wish to switch it off, follow these steps.
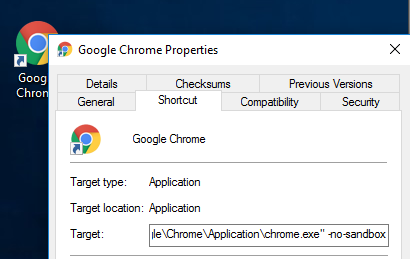
- Navigate to the Chrome shortcut which you use, right-click it and open Properties.
- Click on the Shortcut tab.
- Notice that there will be some text entered in the Target textbox. Select it and towards the very end of the text (at the end of the quotation marks, enter -no-sandbox.
- Click Apply | OK.
Terminate Third-Party Cookies
Cookies are data stored on your computer or smart phone or tablet by certain web pages upon visiting them, and contain information which is often used by the website (which created it) for tracking the particular user, and storing the session information within its domain. These cookies are helpful in some ways, but third party cookies which are often used by advertisers to track user movements across the web can be problematic in terms of performance. Here is how you can disable them.
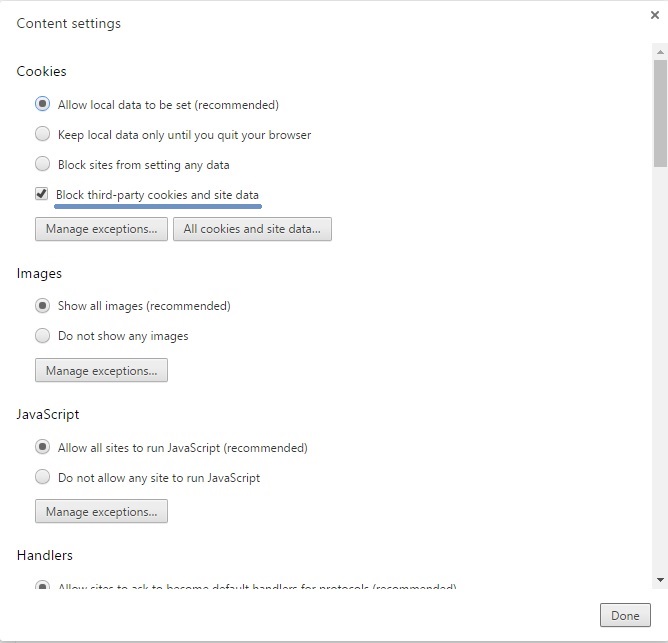
- Type chrome://settings/content/ in the address bar of Chrome and press Enter to open up the Content settings window.
- Under the Cookies heading, turn on the Block third-party cookies and site data option.
- Click Done to save the changes.

Refresh the default AppData Folder
Google Chrome is programmed to store cached site content in it’s AppData folder to facilitate in boosting up page loading time by a noticeable margin. This results in the accumulation of huge amounts of data in this folder and this pile grows steadily (as you visit new sites). Deleting the contents of this data once in awhile is a good idea to erase any contents that might have gone corrupt and also to free up vital storage space.
- Press Windows Key + R to bring up the Run box. Type %localappdata% and press Enter.
- From the folder that will open up, browse to Google\Chrome\User Data.
- Look out for the Default folder. Simply press Shift + Delete to remove it permanently.
- Once you relaunch Chrome, this folder will be recreated automatically and populated accordingly. In the beginning sites might take a little longer than before to load up, but this issue will soon subside.
Recommended: Clean Junk, Optimize Internet & PC
Chrome’s performance can be boosted if you clean its junk, optimize your internet settings and turn off background services. We all know Chrome take a lot of computer memory, and it sometimes crashes, and slows down. You can use the Intel Software Partner, RegInOut System Utilities to make your Chrome Faster.
Stop Hardware Acceleration
This is another handy trick that can help you in getting around Chrome’s unresponsiveness issue. Hardware Acceleration enables the applications to utilize the hardware, installed in the system, which specializes in doing certain tasks instead of solely depending on the CPU (Central Processing Unit). However, it can lead to problems with other processes specially if the computer isn’t a very high powered one or if the GPU which is mostly used for rendering web pages is not that powerful enough or if it’s quite old and there are no updated drivers available. Therefore, disabling this option in Chrome is a good idea.
- Type chrome://settings/ in the address bar and press Enter.
- Scroll down the page and click Show advanced settings.
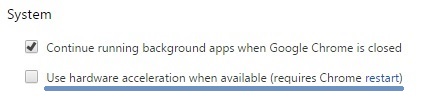
- Once again scroll down, locate the System heading and then deselect the checkbox for the Use hardware acceleration when available option.
- Relaunch Chrome for the changes to be applied.
Reinstall Chrome
Reinstalling any software when it is not performing upto the mark is always an advisable option. Simply uninstall Chrome and then reinstall it from it’s setup file.
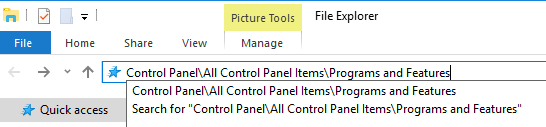
- Navigate to Control Panel\All Control Panel Items\Programs and Features by typing this address in the address bar on Windows/File Explorer


- Locate Google Chrome by searching its name, then right click on it, and then select “Uninstall” to uninstall it from the system


- Navigate to https://www.google.com/chrome/ (Use the link in the browser – Internet explorer which comes with Windows by default) to install the software once again.